

STRAIGHTEN UP!
Rain.
We’ve seen a lot of rain in the last few weeks.
Given the dry weather we so frequently experience, I hate complaining about getting rain...but man, we could sure use a break!
The rain has been excessive at times, and unfortunately, as we all know so well, it often comes packaged in intense thunderstorms.
I slept through the one that came through the other night, but I’m not sure how. The damage it left behind was clear evidence that it was an intense one. In our neighborhood, and neighborhoods all over town, it looked like a hurricane had come through. Trees and branches littered yards and streets.
Arriving at work that next morning, I was nervous about what I was going to discover...but to my relief, the greenhouse was standing intact, and all the large trees on the property were relatively unscathed, just random small branches blown all over the place.
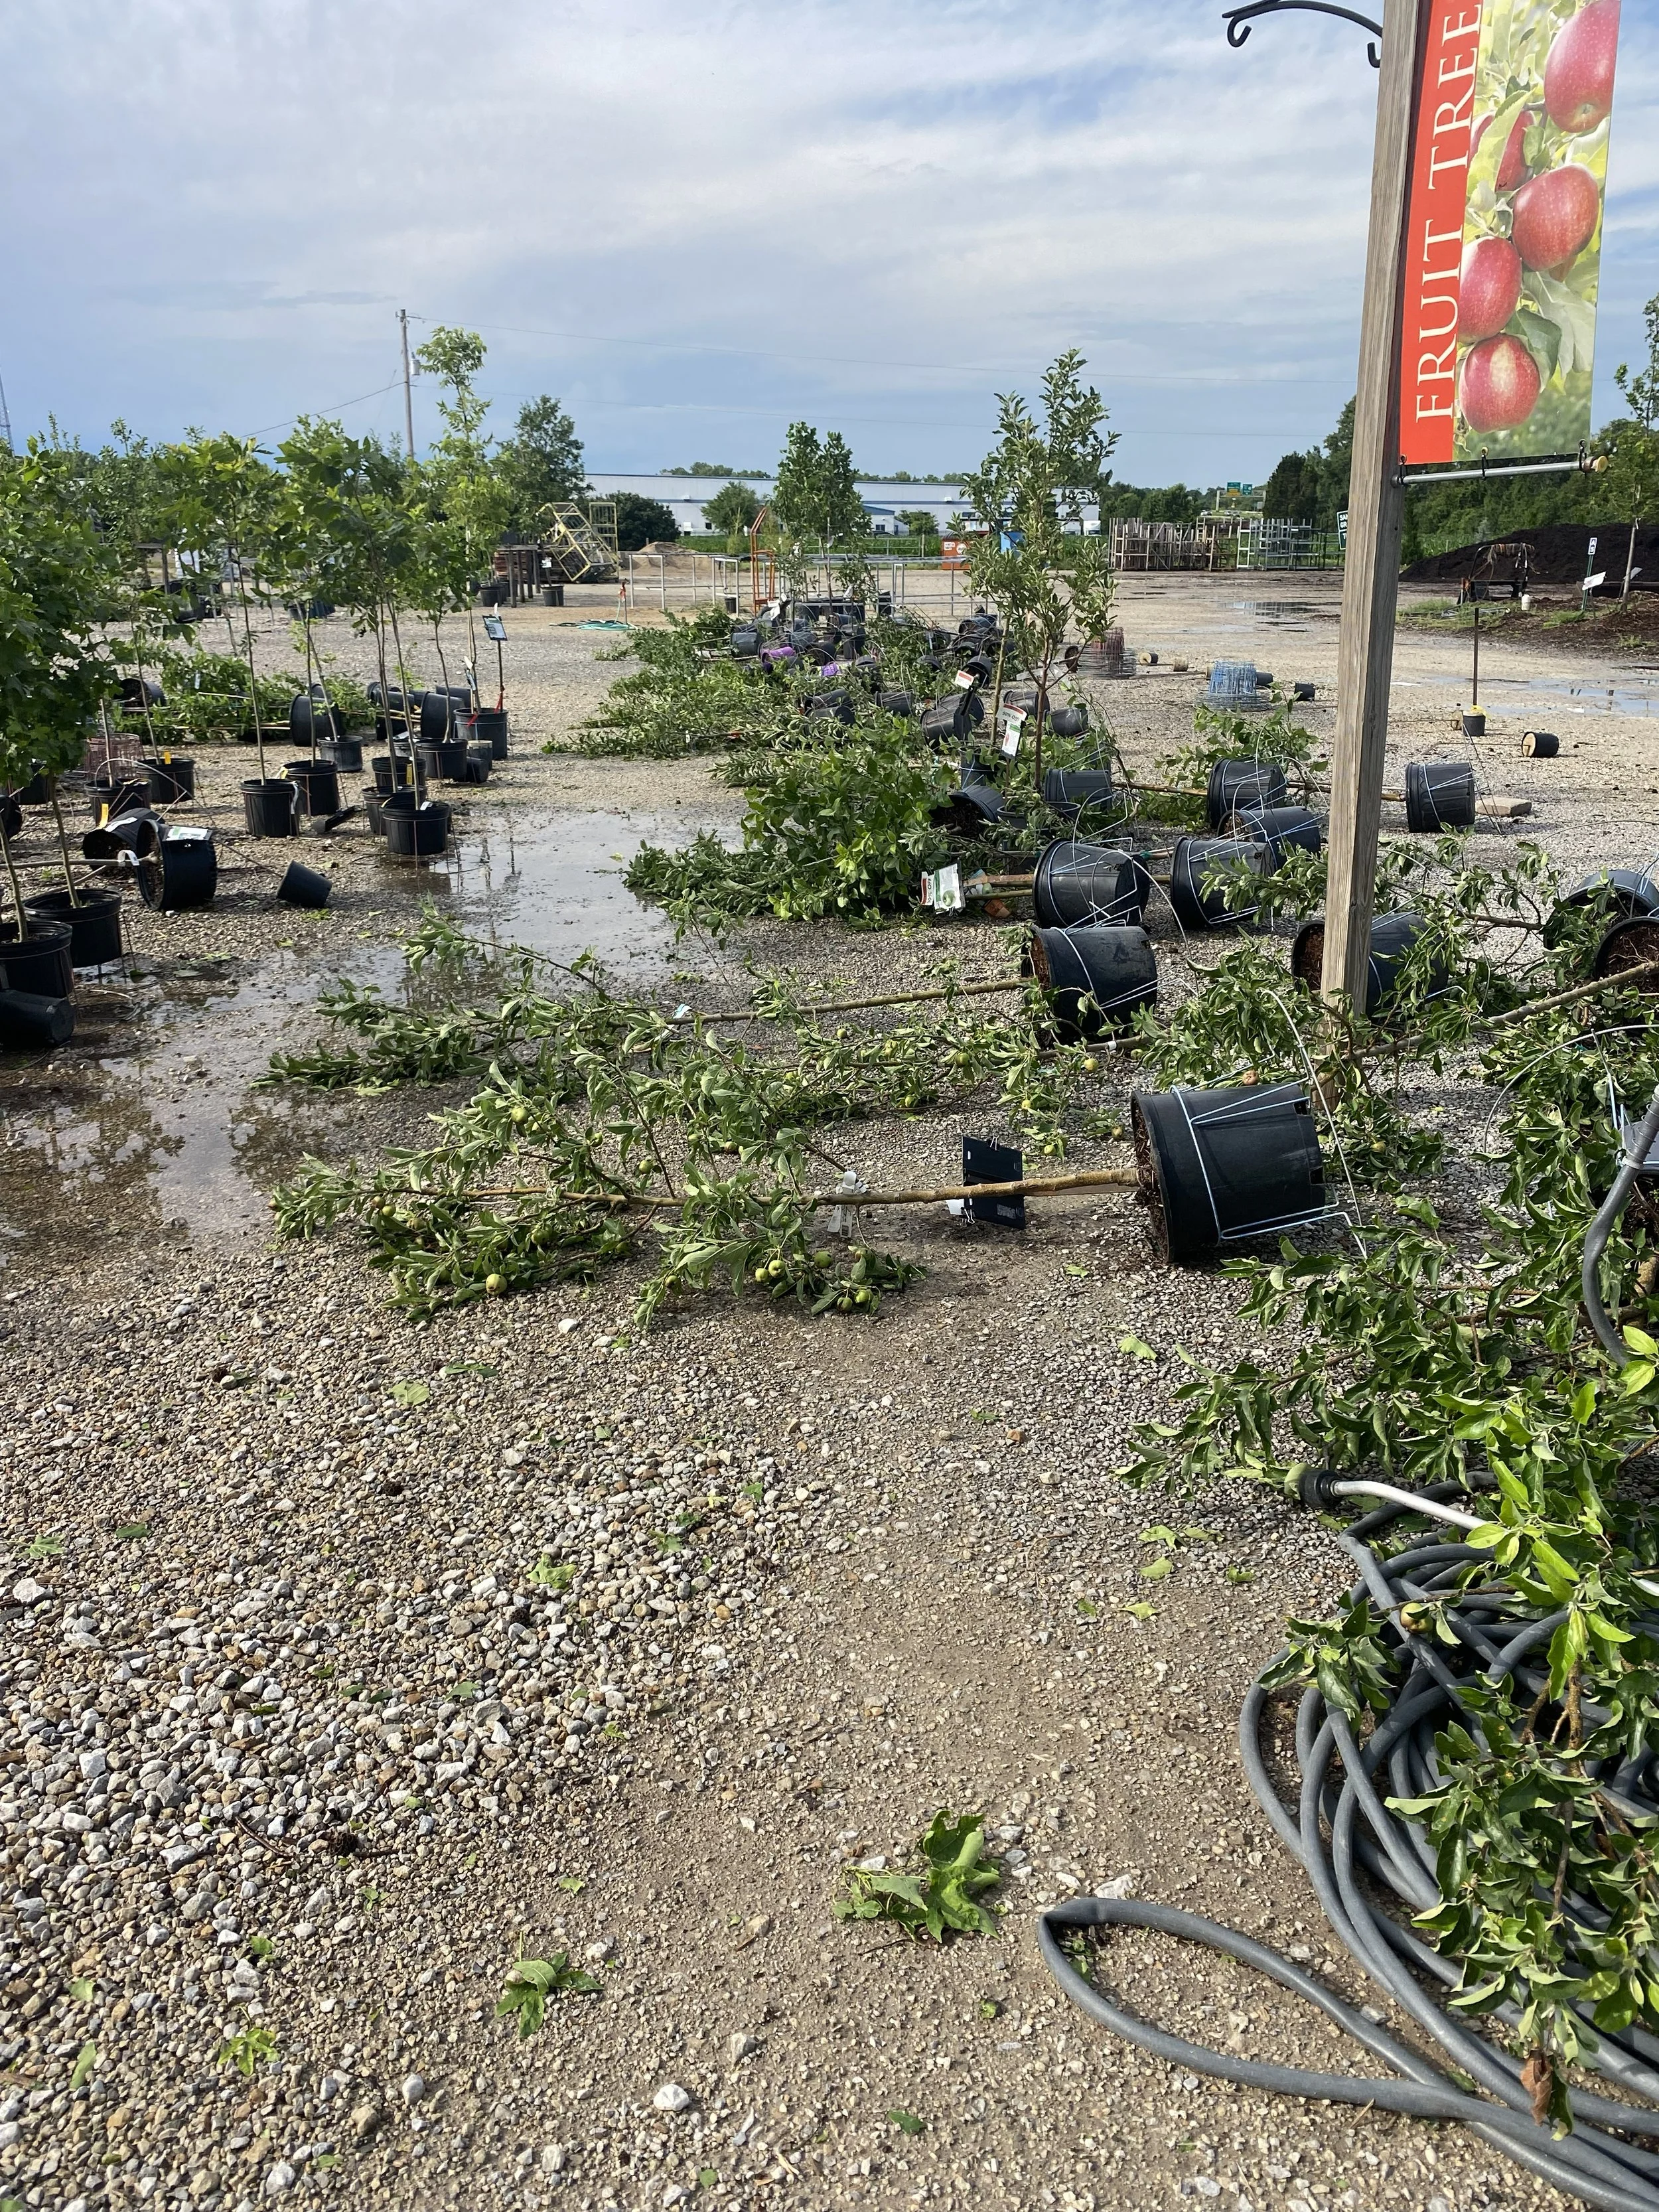
Of course, the nursery was a mess.
All the nursery stock was blown over, and there weren’t many plants left on the tables either, but even with all that, actual plant damage was rare and, in most cases, relatively minor.
By late morning, everything was standing back upright, all the tables were full of plants lined up in nice straight rows, and all the random tree branches had been cleaned up.
We were back in business!
Since this past storm, there has been a steady stream of calls from folks with recently planted trees that have blown over, some a little, and unfortunately, some a lot.
If you are in the same situation or find yourself in this predicament down the road, what should you do? Here are a few suggestions...
Evaluate the damage. A leaning tree may just be a tree that’s shifted due to strong winds and saturated soil conditions. However, it may also be because strong winds broke key roots holding the tree upright. You may be able to get these trees straightened back up, but without key structural roots, you may not be able to keep them that way long term without lots of extra support and some crown reduction/thinning. And unfortunately, sometimes replacement is the best choice.
Straighten things back up as soon as you can and then, if your tree wasn’t staked before...get it staked now! If it was already staked, untie the stake, straighten the tree, and retie your support. Keep in mind, you may need to stake your tree more securely than before by adding additional supports.
You may have to do some digging to get things straightened back up. When the ground is saturated and the wind is blowing, things can get shifted. Often, the only fix is to dig around the root ball, making room for it to “roll” back to a vertical position. Take your time and dig as much soil away from the root ball as needed. When you’ve got it straight again, backfill just like you did when you planted it the first time, and water it in well.
Keep an eye on water needs in the days, weeks, and months to come. A tree getting blown off vertically, and a tree being straightened back up, is likely going to experience some root damage...possibly a lot. Your tree will likely need you to tend to it as if it were just newly planted. Don’t overdo it, but keep an eye on the soil, and give it a good, deep soaking whenever it gets dry.
This is a good time to make sure you have grass removed from the area underneath your tree. I like to see folks remove all the grass 3’ from the trunk, all the way around. That will leave you with a 6’ diameter “no grass zone” underneath your tree, which will help your tree tremendously. Cover that ground with about three inches of shredded wood mulch to keep it from compacting and growing up full of weeds, making sure not to pile any against the trunk of the tree.

Cameron Rees, General Manager
This is also a good time to look things over and do a little summer pruning. Removing unwanted branches and making needed adjustments to others will help reduce the canopy size and density. That reduced and thinned out canopy will catch a little less wind and hopefully help make it a little less prone to further wind-related damage.
As always, reach out to us if you have questions. Call us at 785-233-9657 or email us with questions and pictures at info@skinnergardenstore.com. We’ll try to help in any way we can.
Good luck!
—Cameron Rees
“THYMELY” ADVICE: BAG WORMS ARE OUT!

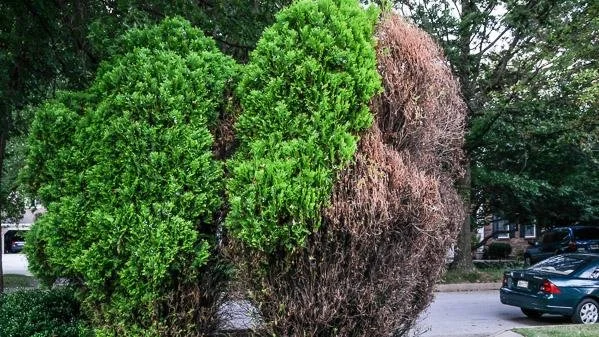
As Summer begins, your trees and shrubs might be hiding a little secret. Small caterpillars could be invading and setting up homes right under your nose. The Bagworm. I’ll tell you what to look out for, and what you need to do to control the population and potentially save those beautiful trees and shrubs you’ve worked so hard to maintain.
Bagworms are typically most active during the late spring-summer months, usually beginning in mid to late June until early Fall. They resemble small ¼ in caterpillars that have the beginning stages of their bag (silk woven plant debris) usually covering the bottom half of the insect. Right after emerging, these guys are super small, but if left unchecked, they can do quite a bit of damage to your landscape. They tend to be super camouflaged among plants, often times not being noticed until tremendous damage has been done.
These little guys don’t live for long, with females dying after they lay their eggs and males dying after breeding. Because of their short life span, there are specific times that you can be most effective in treating them, and the bag that they construct serves as a sanctuary away from harmful predators and some pest control options.
Spraying for this pest is going to be more effective when they are still small, young, actively feeding, and most vulnerable. The larger the bag gets, the closer to the pupal stage where the male worm transforms into a moth, and the harder they get to kill. Treating with Fertilome Spinosad will effectively reduce the number of worms infesting your tree. It’s highly effective, and best yet, it’s organic.
If you don’t want to spray, hand-picking is always an option. Pluck bags right off the tree and placed in soapy water to kill the insect inside, and hopefully prevent them from producing thousands of eggs, waiting to hatch and start the process all over again next year.
Being vigilant and paying close attention to your landscape will greatly reduce the number of problems plaguing you. As always, we are here to help, just stop in or give us a call.
—Melissa Anderson
NATIVES for aLL seasons
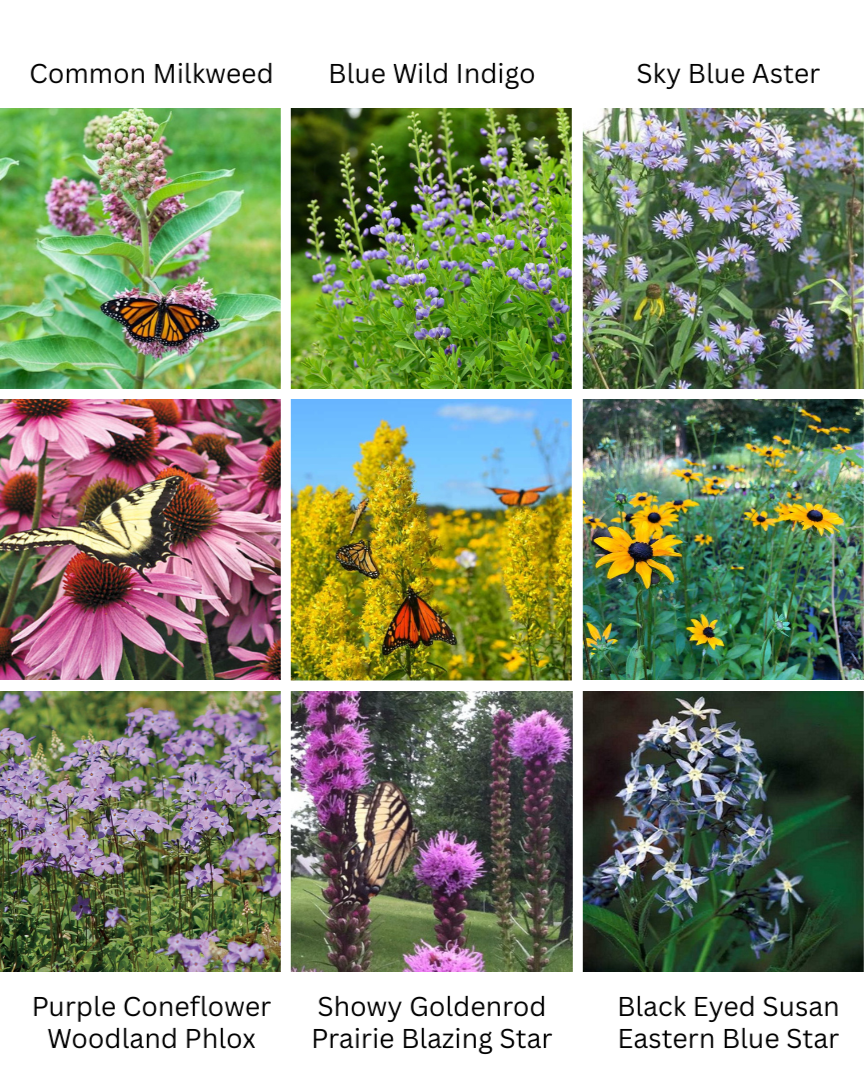
Natives to Plant for All-Season Color and Their Benefits:
SPRING & EARLY SUMMER
Woodland Phlox (Phlox divaricate) – Vital nectar source for waking pollinators.
Blue Star (Amsonia) – Attracts early-season pollinators.
False Indigo (Baptisia) – Provides nectar for early-season bees, especially bumblebees. Serves as a host plant for native butterfly caterpillars. Songbirds love the seeds.
MID-SUMMER
Coneflower (Echinacea) – Provides a steady supply of nectar and pollen.
The seeds of the un-deadheaded blooms will feed songbirds.
Milkweed (Asclepias) – Provides vital habitat for endangered monarch butterflies. Monarchs eat nothing but milkweed leaves. The plant’s sap provides them with natural toxins that make them unpalatable to predators. Nectar is a favorite for native bees, hummingbirds, and other butterfly species.
Black Eyed Susan (Rudbeckia) – Nectar source for bees, hummingbirds, and other beneficial insects. Leaving spent seed heads on the stems over winter provides a reliable food source for songbirds.
LATE SUMMER & FALL
Aster (Symphyotrichum) – Provides late-season nectar and pollen at a time when other blooms are scarce. Act as an essential nursery and food source for the caterpillars of specific native butterflies.
Blazing Star (Liatris) – The fluffy flower heads are packed with nectar.
Goldenrod (Solidago) – Provides vital nectar and pollen when other flowers have faded. It is a crucial energy source for honey bees building up their winter reserve. Seed heads provide energy-rich food for songbirds.
—Misty Brown
PERENNIALS: MAKING THE SWITCH
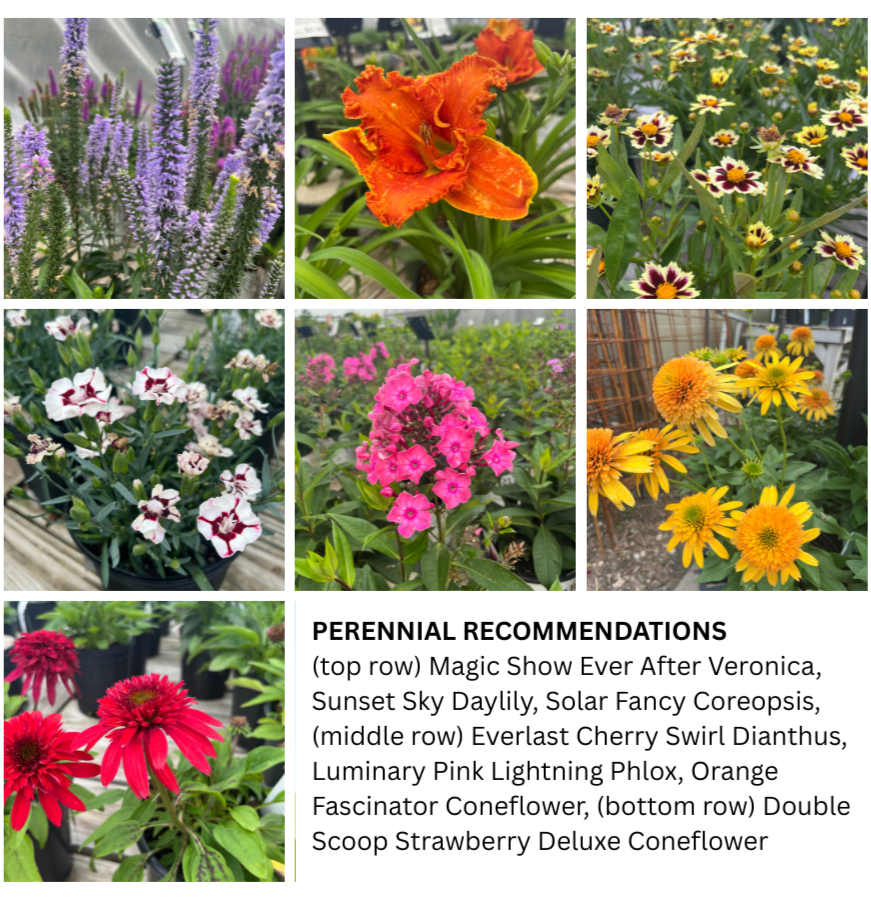
Have you been on the fence on whether or not to switch out your garden from annuals to perennials? Here are some benefits to making the move from annuals to perennials.
Return on Investment: Tho perennials can be more costly, it is an upfront cost for years of enjoyment.
Free Plants from Division: Most perennials will multiply over time to the point where the roots can be dug and divided and moved to another part of the garden.
Maintenance: Once perennials are established will need much less watering. Annuals need almost daily watering during the summer months. Feeding your perennials is much more cost-effective, especially since annuals need more fertilizer than annuals.
Pollinators: Bees, butterflies, and birds need the year after year support from the perennials you bring to your garden. Perennials provide consistent nectar, pollen, and habitat for the pollinators.
Flowering Season: Mixing different varieties of perennials in your garden will give you changing colors throughout the season from spring to late fall.
I am not saying that annuals are not worth it! There is an abundance of annuals that give color all season. If you aren’t ready to go all perennials, slowly add a few here and there to your garden. The joys of gardening are in your hands!
—Misty Brown
A Shrub for All Gardens: Hydrangea
This garden favorite, while loved by gardeners everywhere, is at the same time frustrating for many.
When should I prune them? How do I prune them? Why won’t mine flower? Can’t I change the color of the flowers? Where is the right place to grow them?
So many questions, so much confusion!
I wish it were as simple as one quick answer...it’s not. But it also doesn’t take a horticulture degree to enjoy these beautiful plants in your garden; you just need to understand a few hydrangea basics.
First, let’s talk about Bigleaf Hydrangea (Hydrangea macrophylla). I find that most of the time when I’m speaking with someone about hydrangeas, this is what they are picturing...it’s a logical place to start.
There are many forms of this plant to choose from, and most share a popular common trait... large clusters of flowers borne in either pom-pom-like blooms, typically called mopheads, or more open, flat-topped “lacy” clusters, commonly referred to as lacecaps.
The other popular feature is flower color.
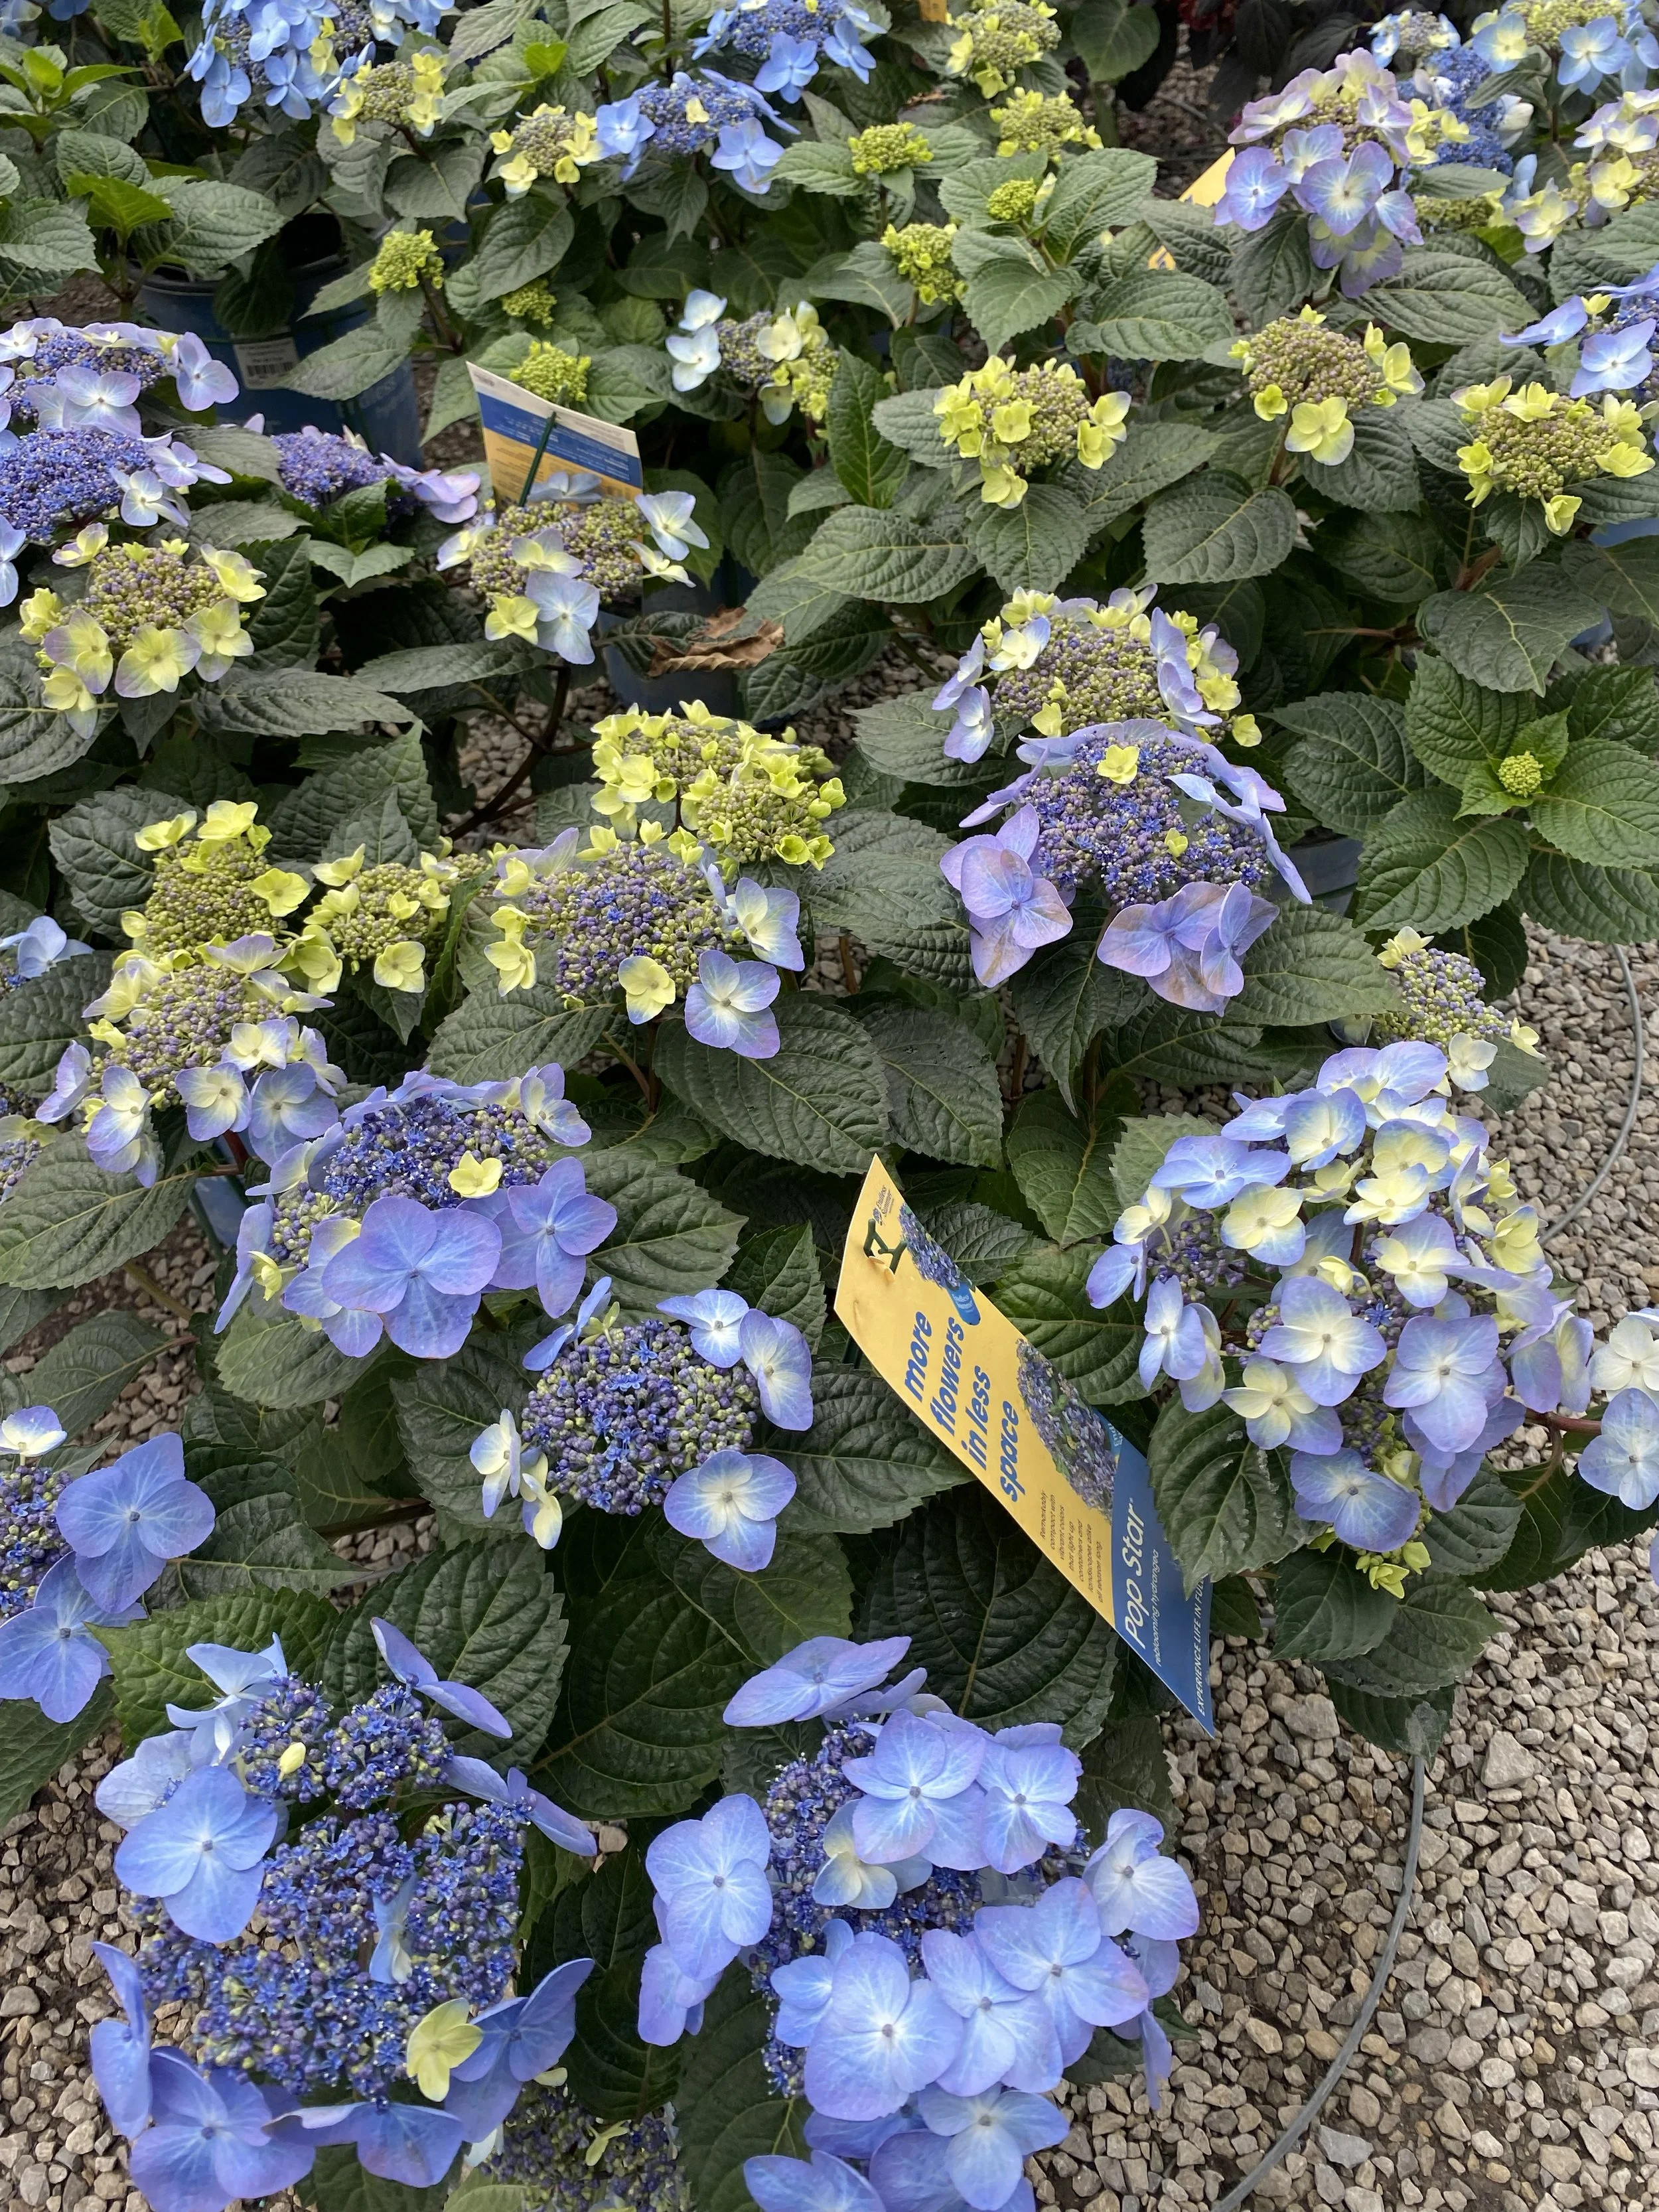
Bigleaf Hydrangea
The blooms of this species sport pinks, blues, purples, whites, reds, and everything in between. You can also manipulate the color of many of these from pink to blue or blue to pink by changing the soil chemistry. Higher pH soils drive flowers more pink, while lower pH soils, with adequate aluminum, cause flowers to turn more blue. Our soils naturally have a higher pH, so blooms will trend pink unless you add something like aluminum sulfate. We keep lots in stock.
Colorful flowers, flowers that change from pink to blue...they sound amazing, right?
They are, but there’s one last piece of information to add into this discussion, and it’s important.
Although this species is winter hardy enough for the plant to survive our winters, it does tend to suffer winter die-back to the above-ground stems...and that’s a problem. Those above-ground stems are where next spring’s flowers will come from.
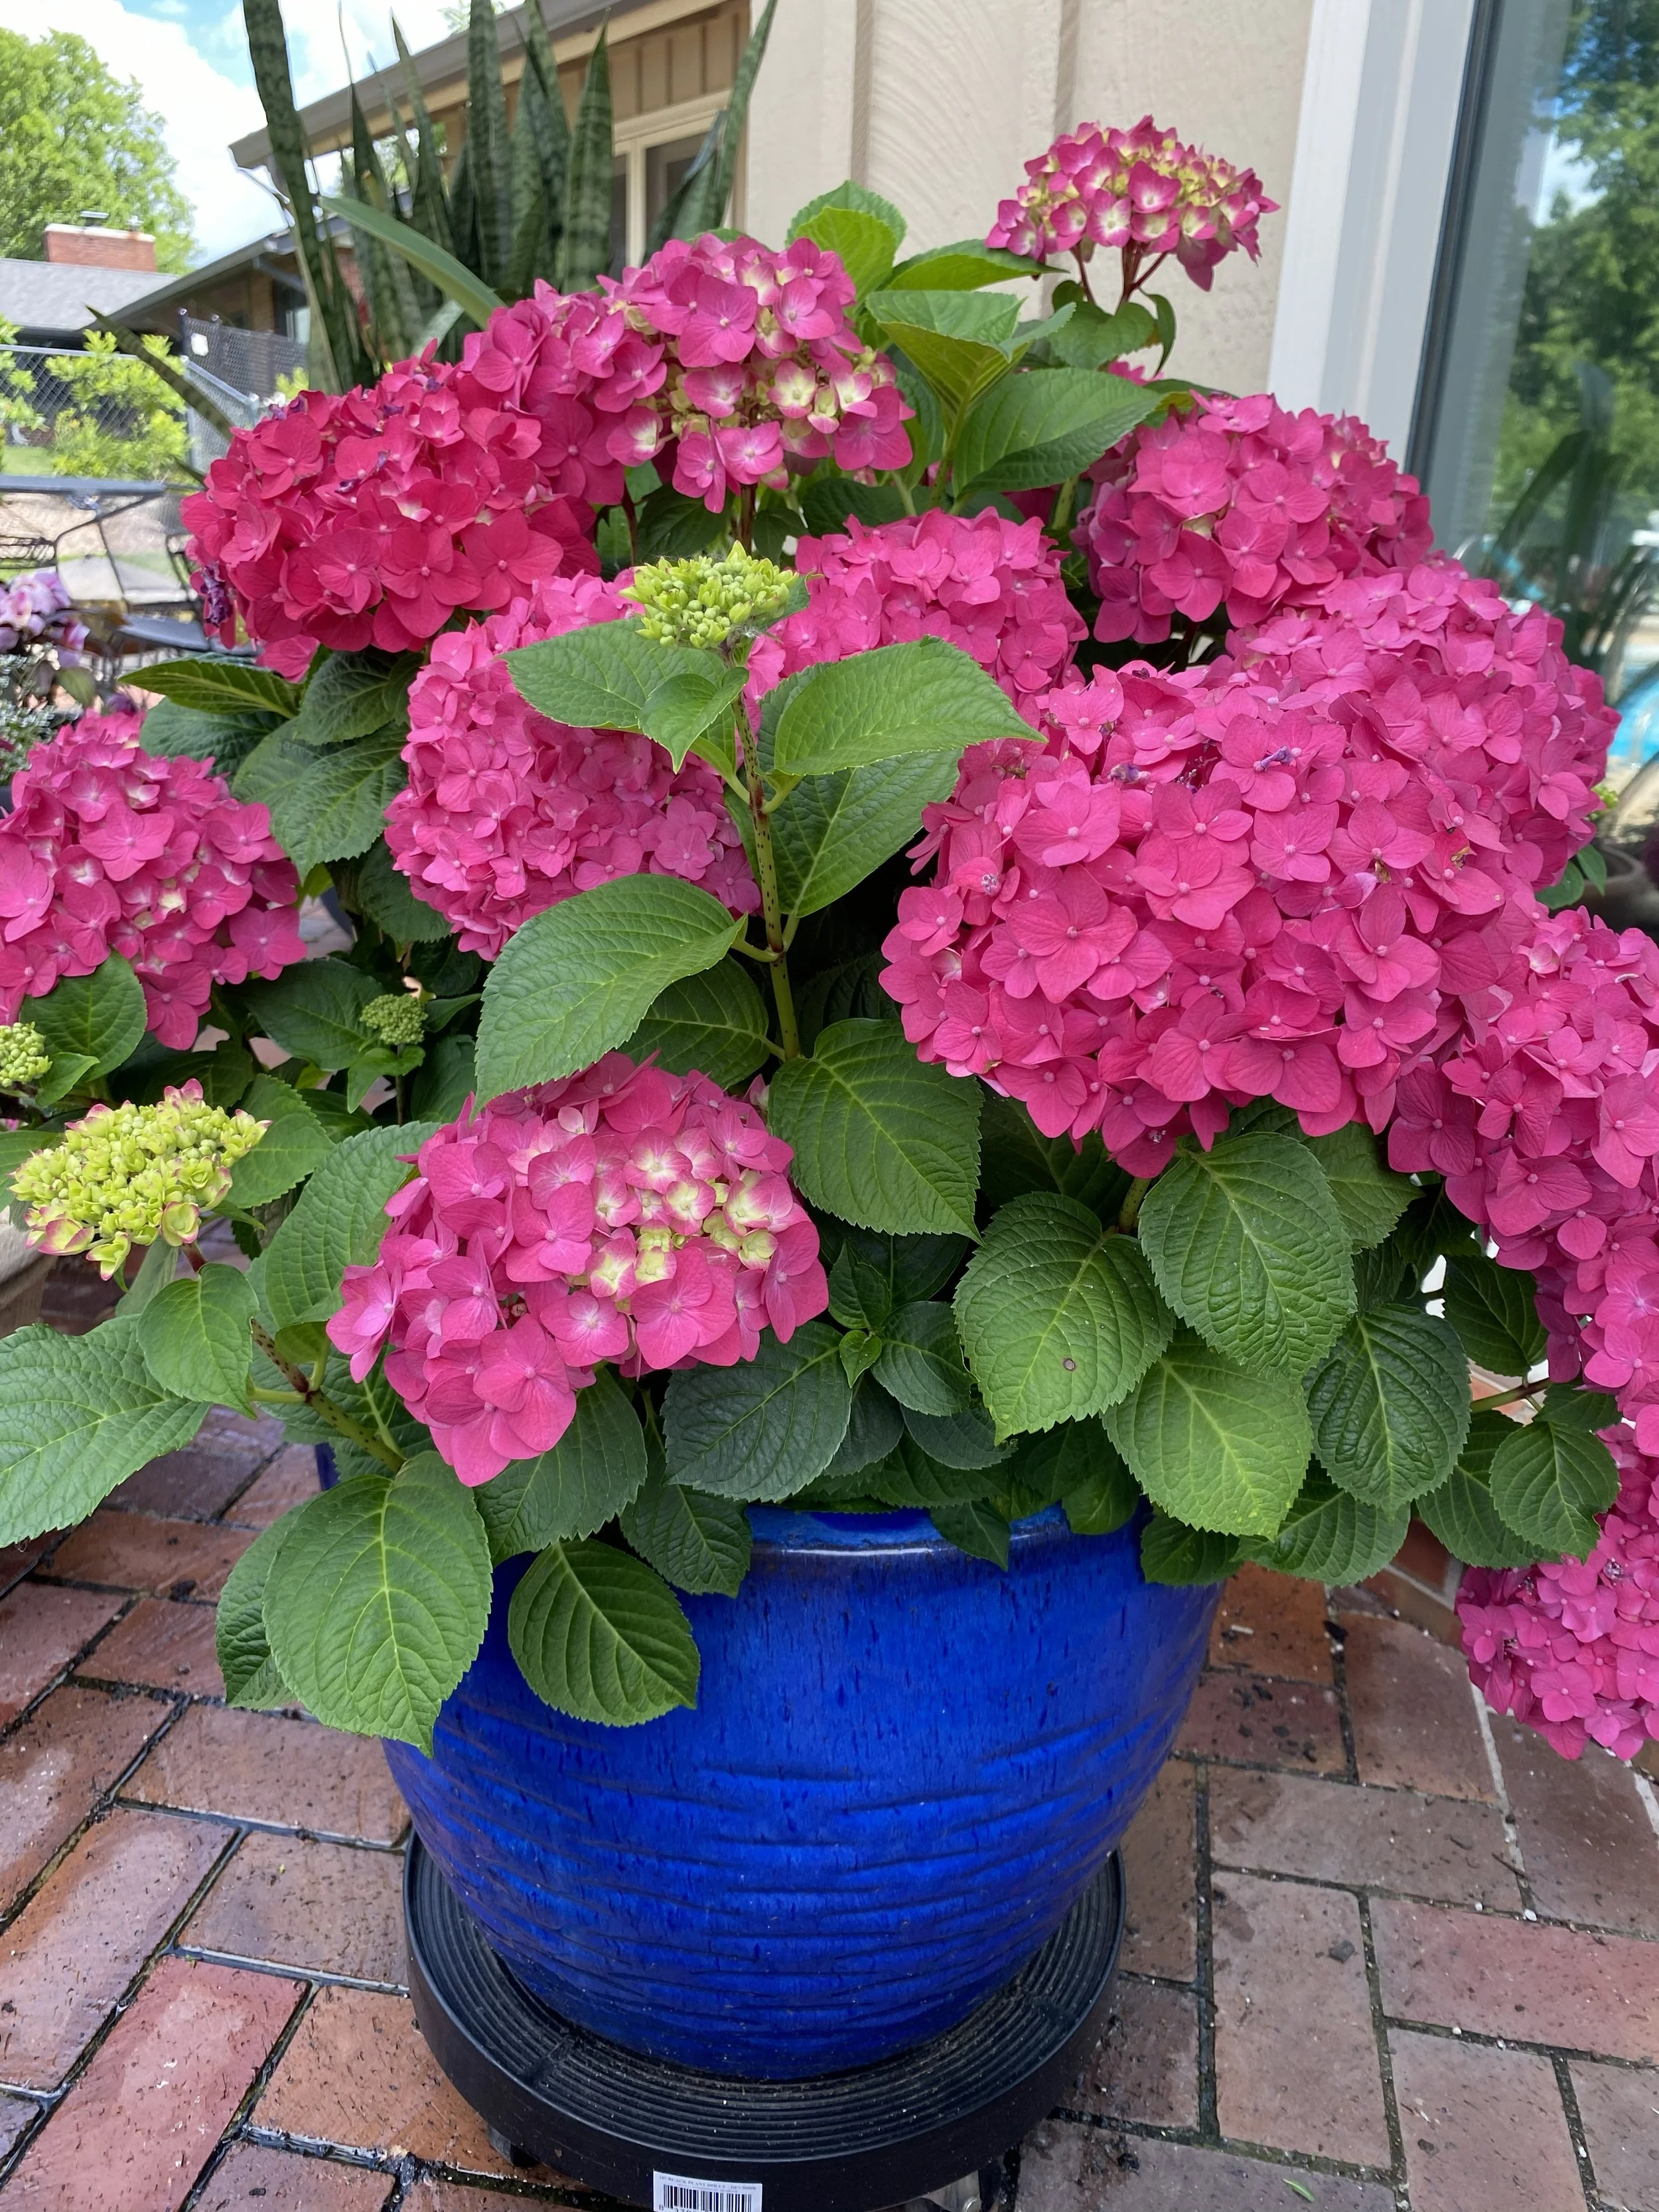
Bigleaf Hydrangea
The horticultural term is blooming on old wood, and that’s just what Bigleaf Hydrangeas do, they bloom off of old wood. That means they grow all summer, forming next year’s flower buds up and down the stems as they go. Those same stems then go dormant in the fall and hang out there all winter. When spring arrives, those old stems wake up, putting out growth from the dormant buds up and down the stems, which end up covered with flowers by late spring. All the spring flowers come from flower buds formed during the previous growing season...aka, old wood.
And this is where the winter hardiness issue comes into play.
In our climate, it is very common for those overwintering stems to be killed by our extreme winter temperatures. The rest of the plant...the roots and the lower crown...typically survive just fine, but the stems above ground, where all the overwintering flower buds are, frequently are killed...and this is important...along with the flower buds they contain. And no flower buds means no flowers.
It’s frustrating, but it’s a very common occurrence in this part of the country...unless you provide extra winter protection.
So, how do you do that?
Extra mulch.
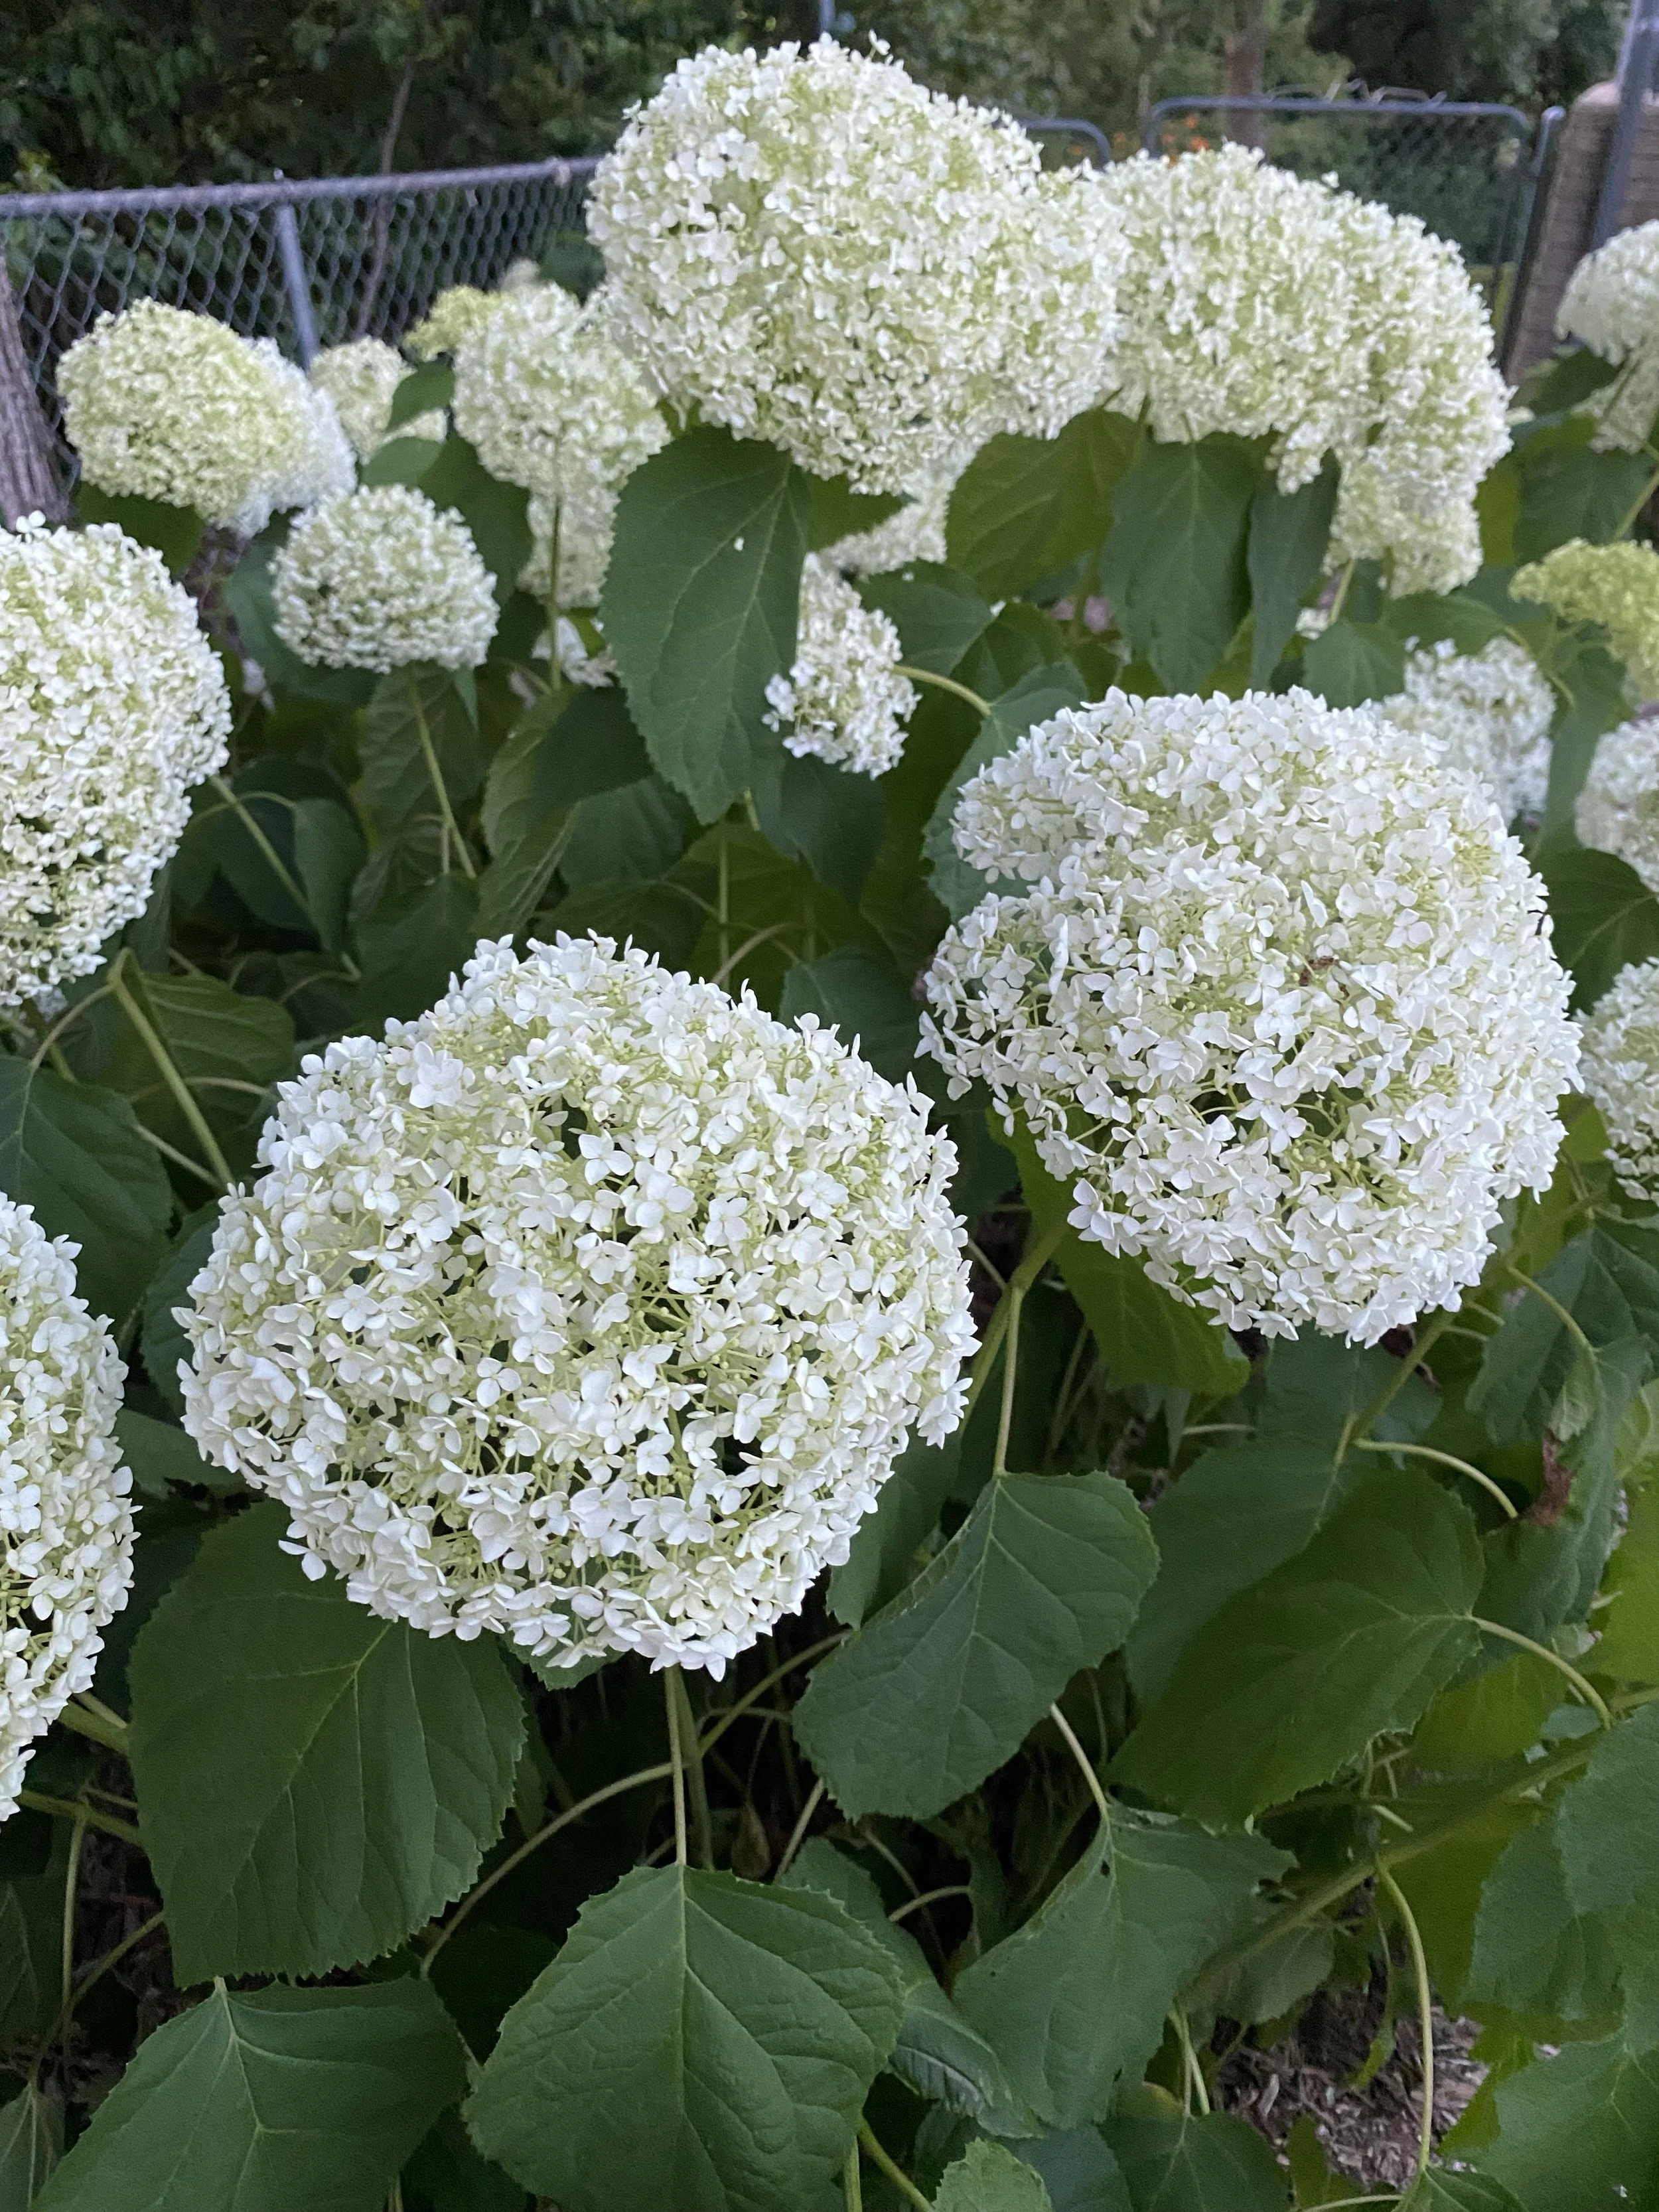
Smooth Hydrangea
If you want those above-ground stems to have a better chance of surviving the winter, mound your plants up...like 2 or 3’ deep...as we head into winter. Use chopped-up leaves or several bags of mulch to cover and protect those stems, much like what is done to protect the stems of hybrid tea roses. Remove that protective mulch in the spring when new growth resumes and you’ll bring a lot of those flower buds through the winter.
It’s extra work, but the reward is amazing blooms. Don’t provide extra winter protection, and you’ll tend to have plants that die back each year, grow back vigorously from the base, but don’t bloom.
Another common mistake with this species has to do with pruning. As I have already mentioned, the flowers come off the old wood. So, if you want the best chance of getting blooms, don’t prune. Pruning back stems removes the future flower buds. Just let them grow.
Okay, that was a lot of information, and maybe it got a little complicated. If you’re confused, ask questions, and we'll try to help.
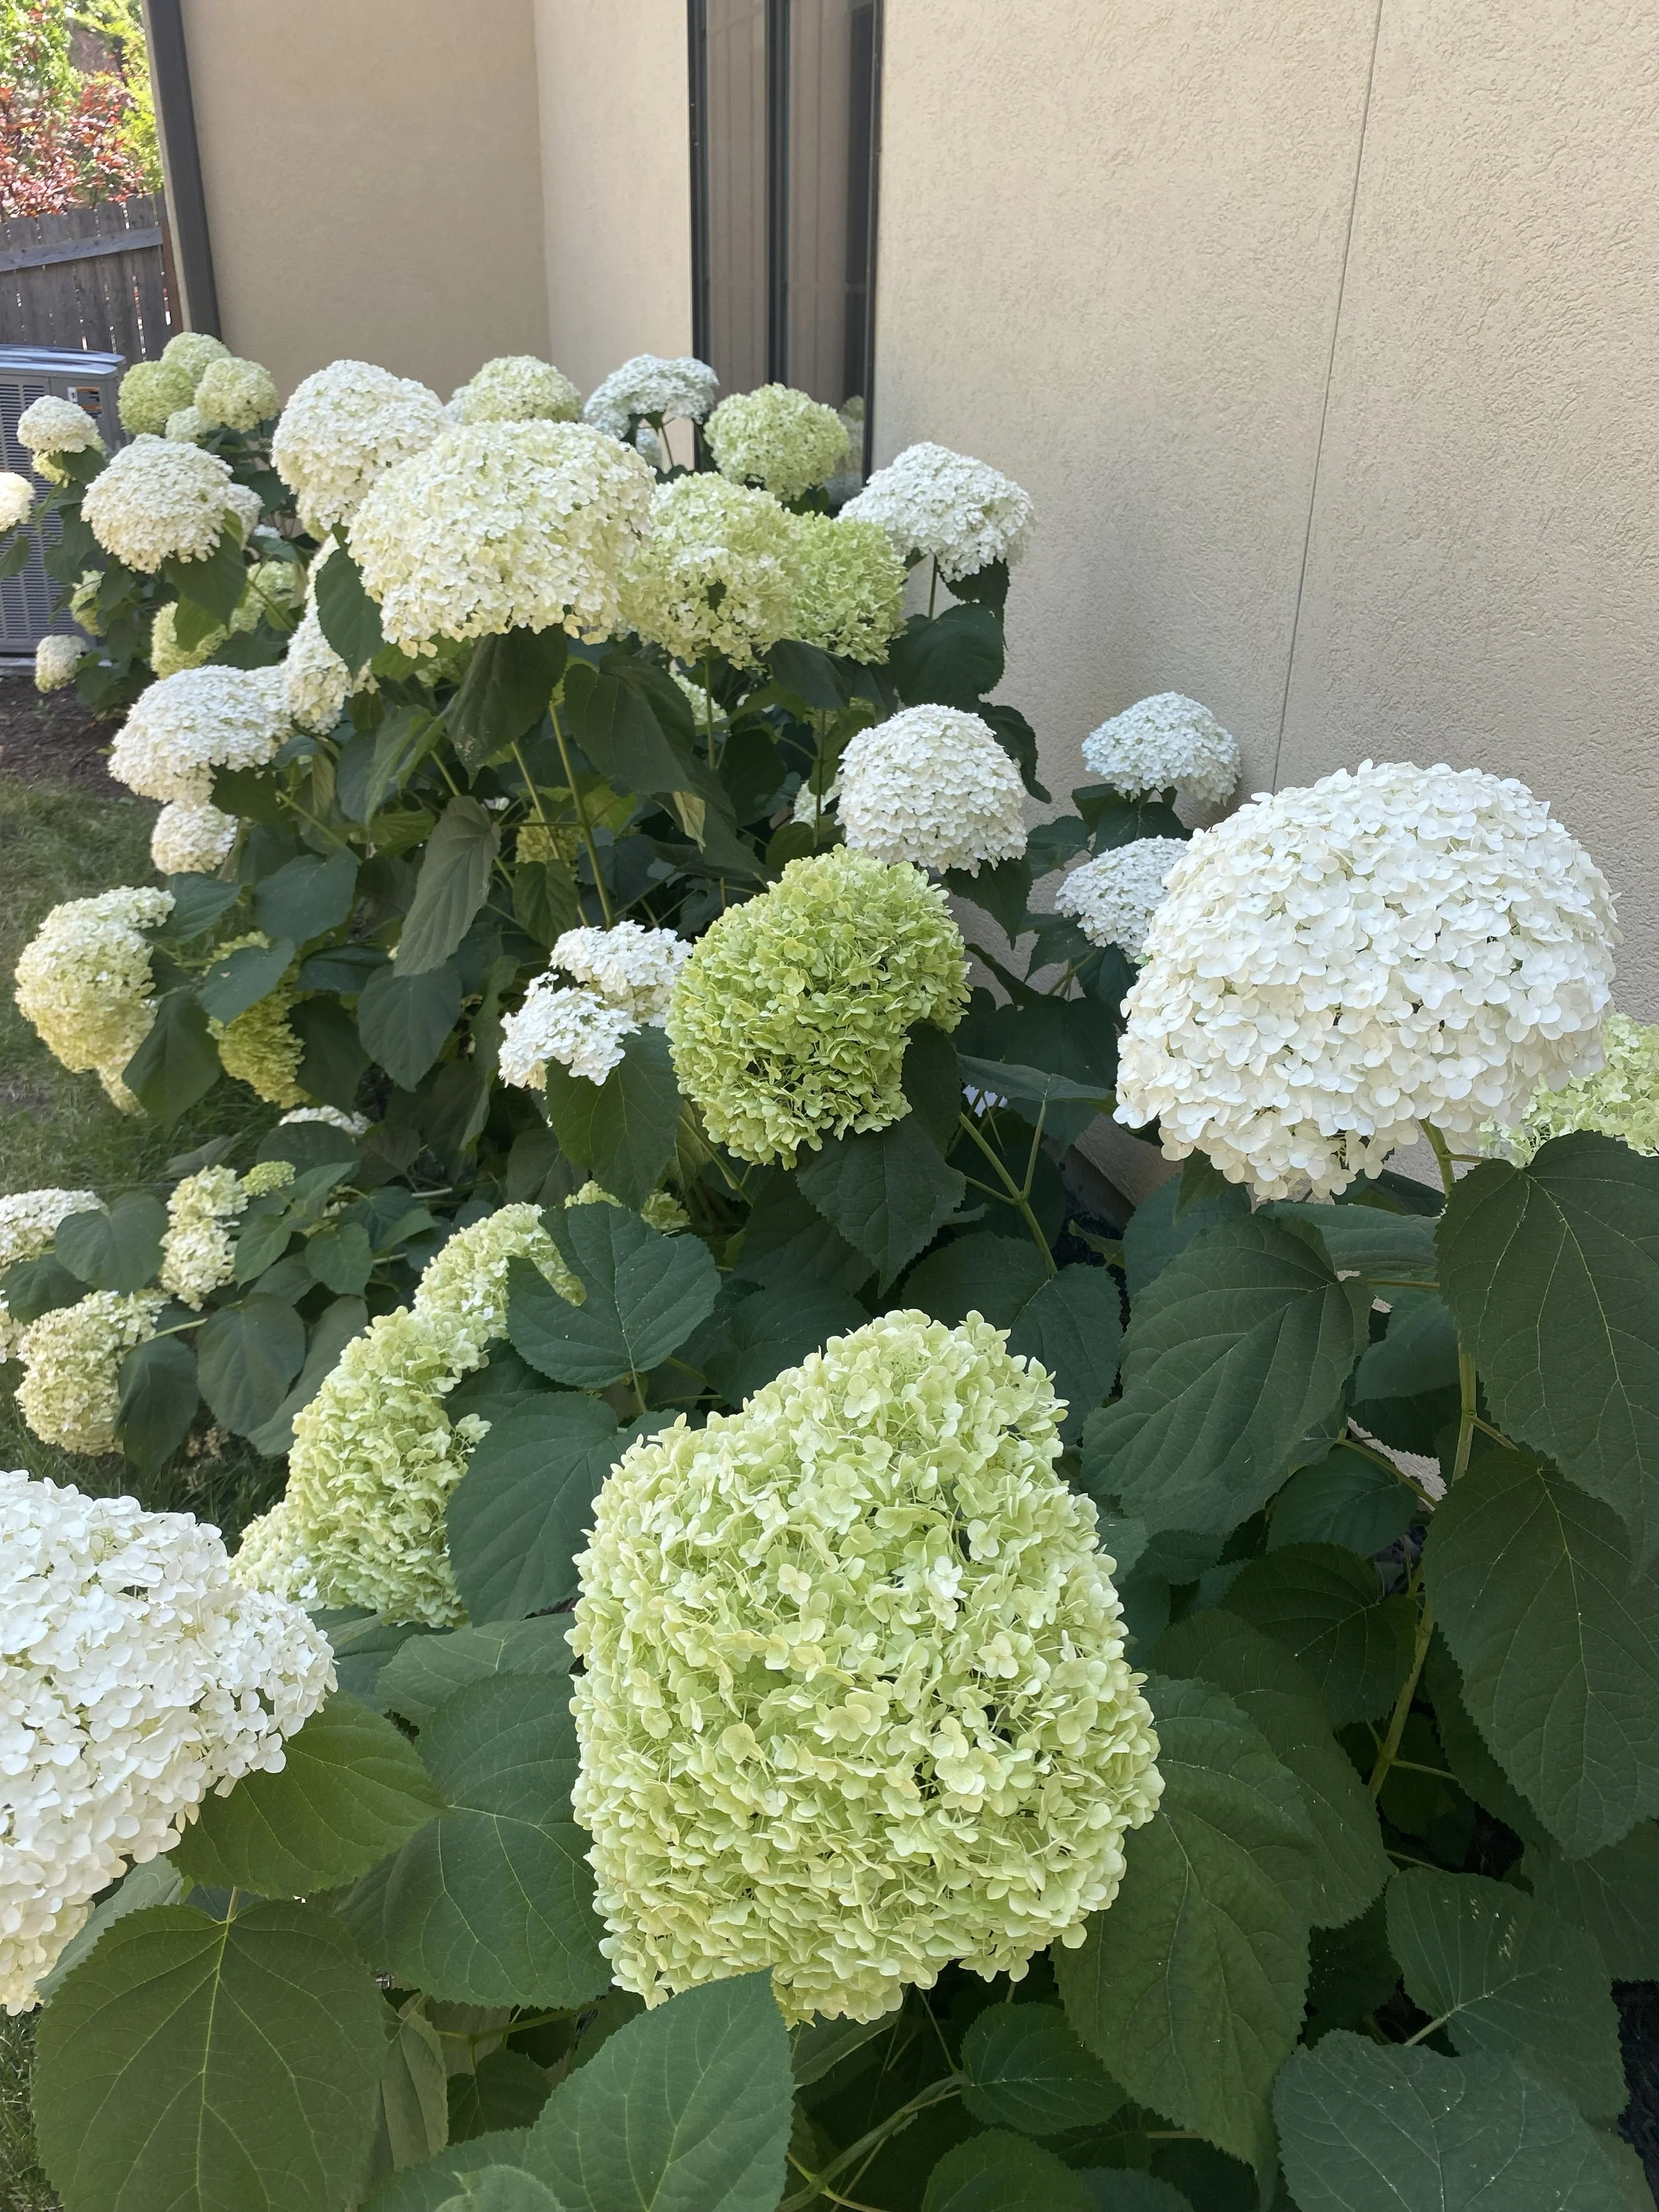
Smooth Hydrangea
The big take-home message is that, although Bigleaf Hydrangea are amazingly beautiful, they are extra work. If you’re not interested in the extra effort, but you’d still like to enjoy hydrangea blossoms in the garden, choose one of the other types.
Which brings us to the other three species we carry, Smooth Hydrangea (H. arborescens), Oakleaf Hydrangea (H. quercifolia), and Panicle Hydrangea (H. paniculata).
These will be a lot easier to explain.
First of all, these three species all bloom white. Technically, there are a few minor exceptions to that rule, but for all practical purposes, if you’re adding these to your garden, you’d better like white.
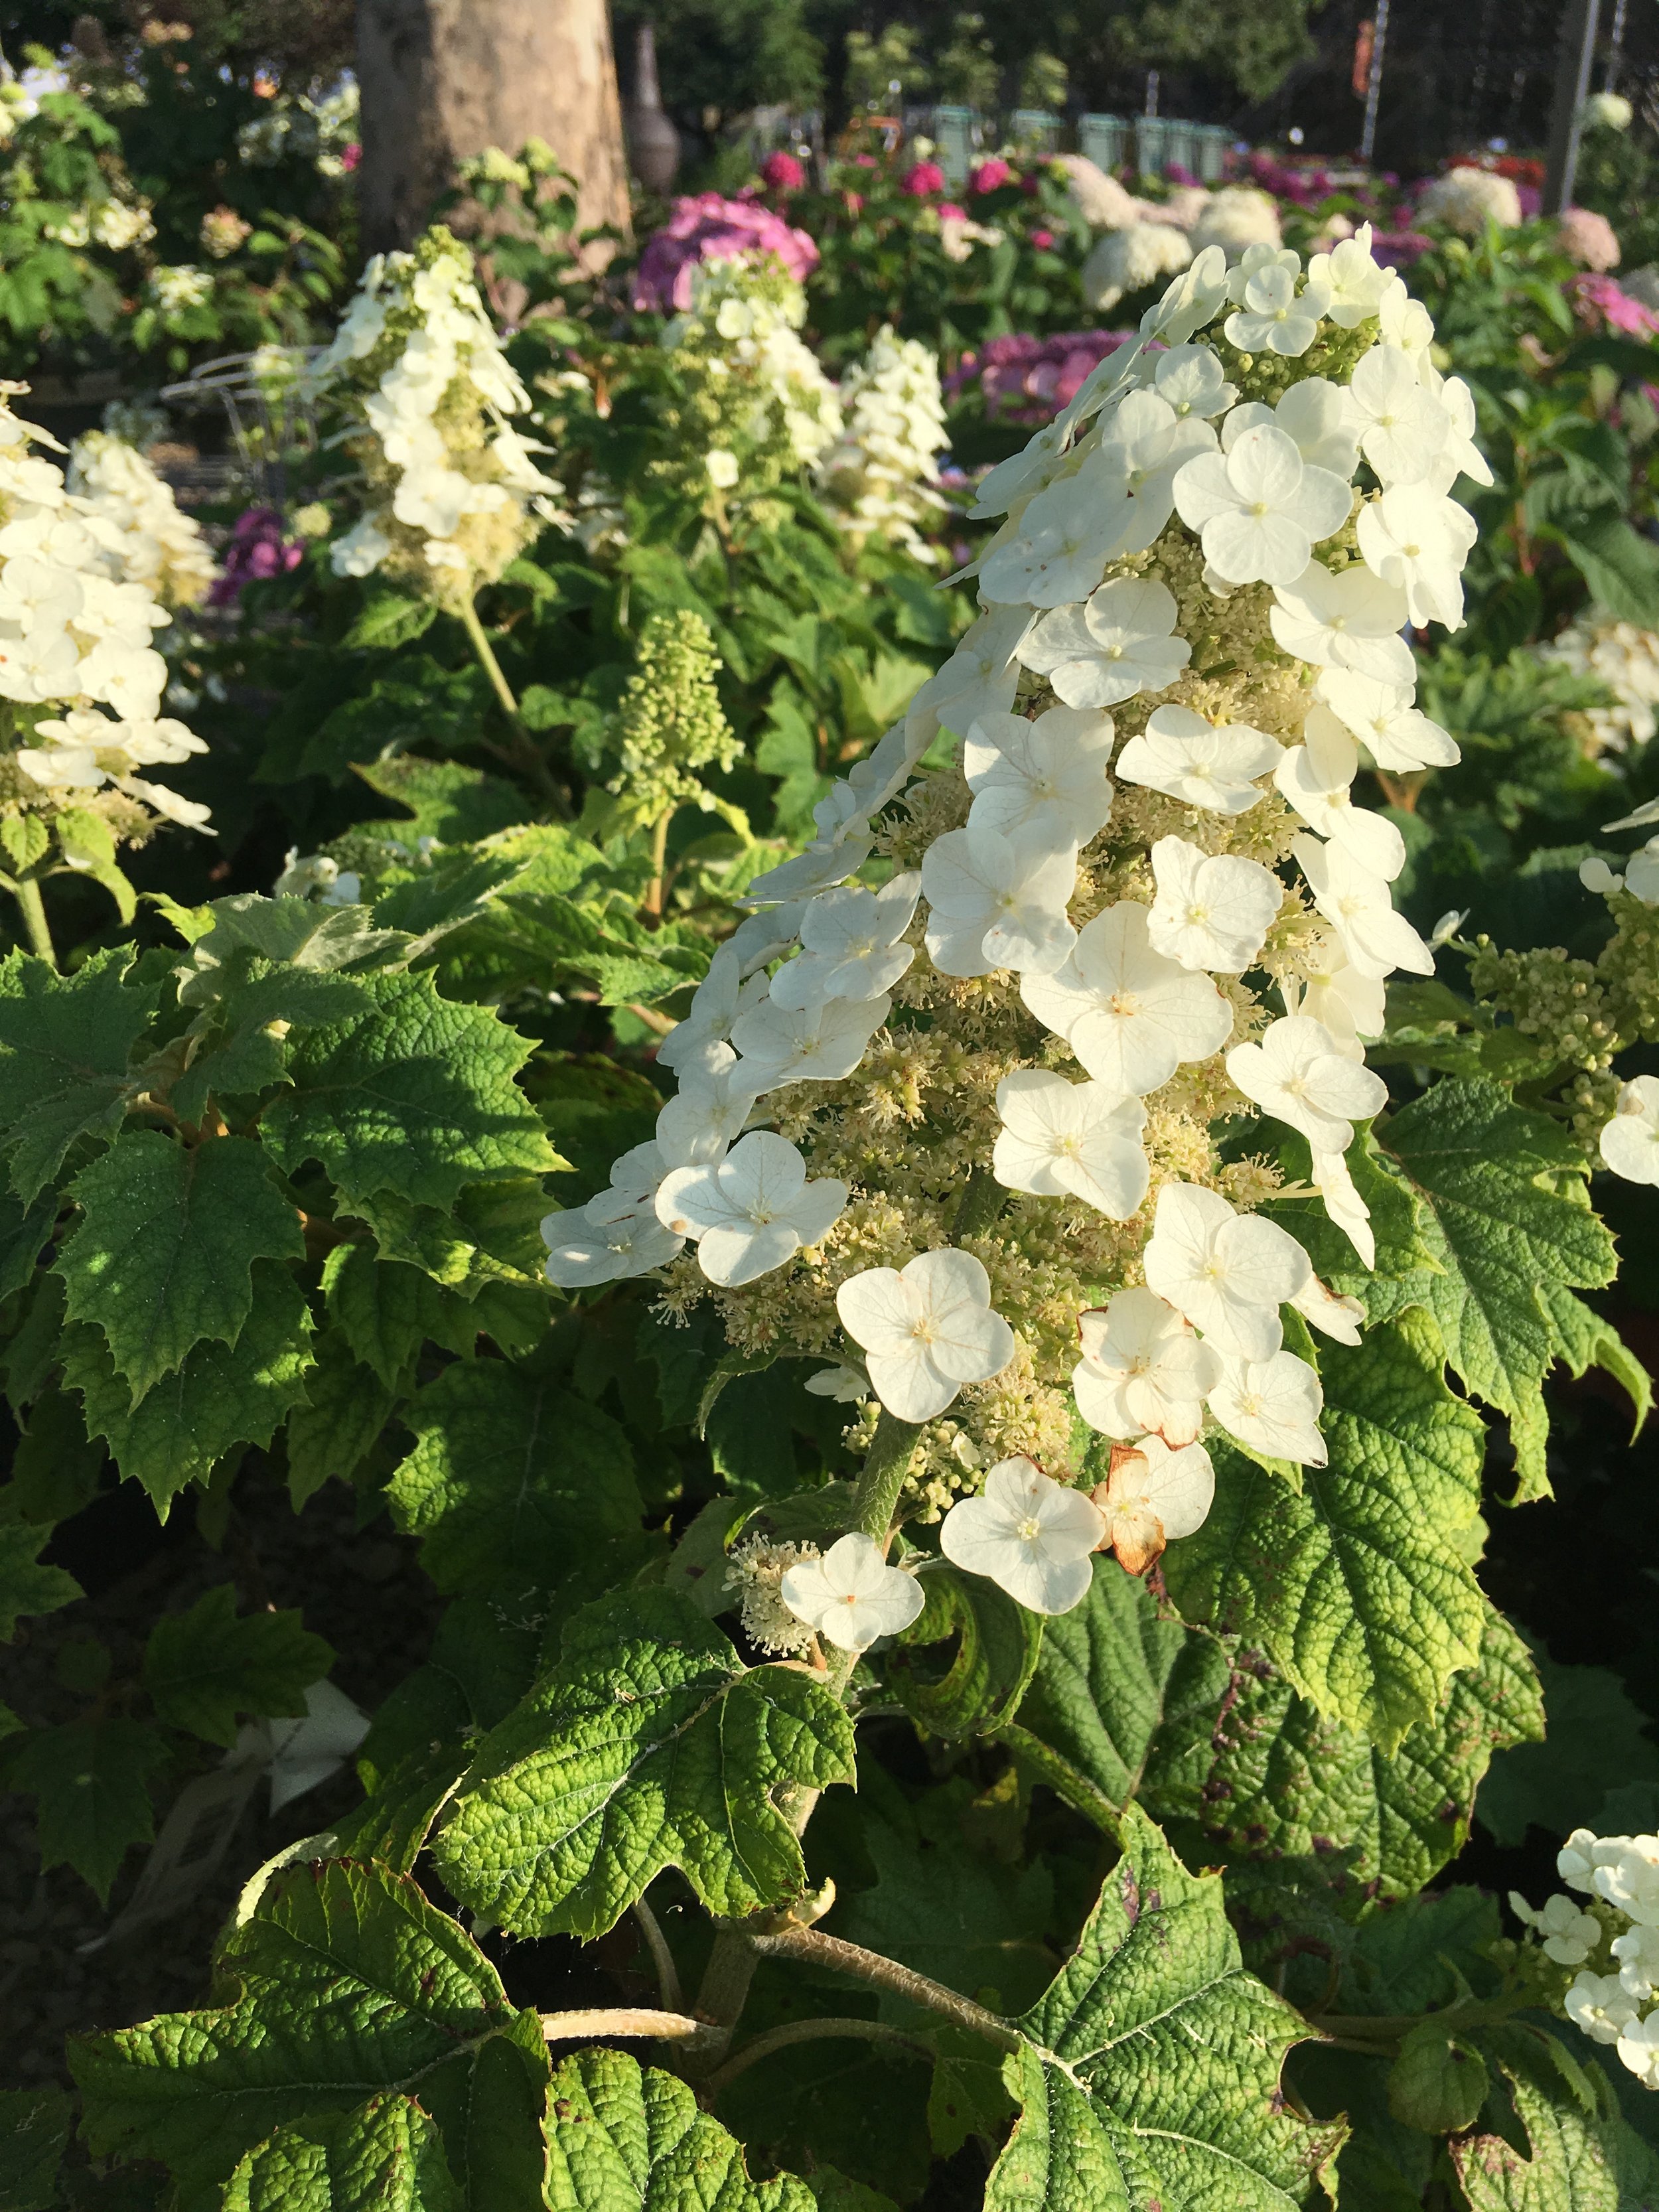
Oakleaf Hydrangea
Here are a few other details...
You can’t change the flower color, no matter what you add.
These are all reliably winter hardy, so blooms come every year with rewarding consistency.
They are all much easier to grow.
Smooth Hydrangea (H. arborescens) – These are one of my favorites! They have big white mophead flowers by late May, continuing into June. They bloom on new wood, so cut them back coming out of winter, or don’t cut them back...it doesn’t matter. They’ll bloom either way. See...they’re easy! Plant them in some shade, making sure you protect them from the afternoon sun. Think the north and east side of your home or in the shade of trees.
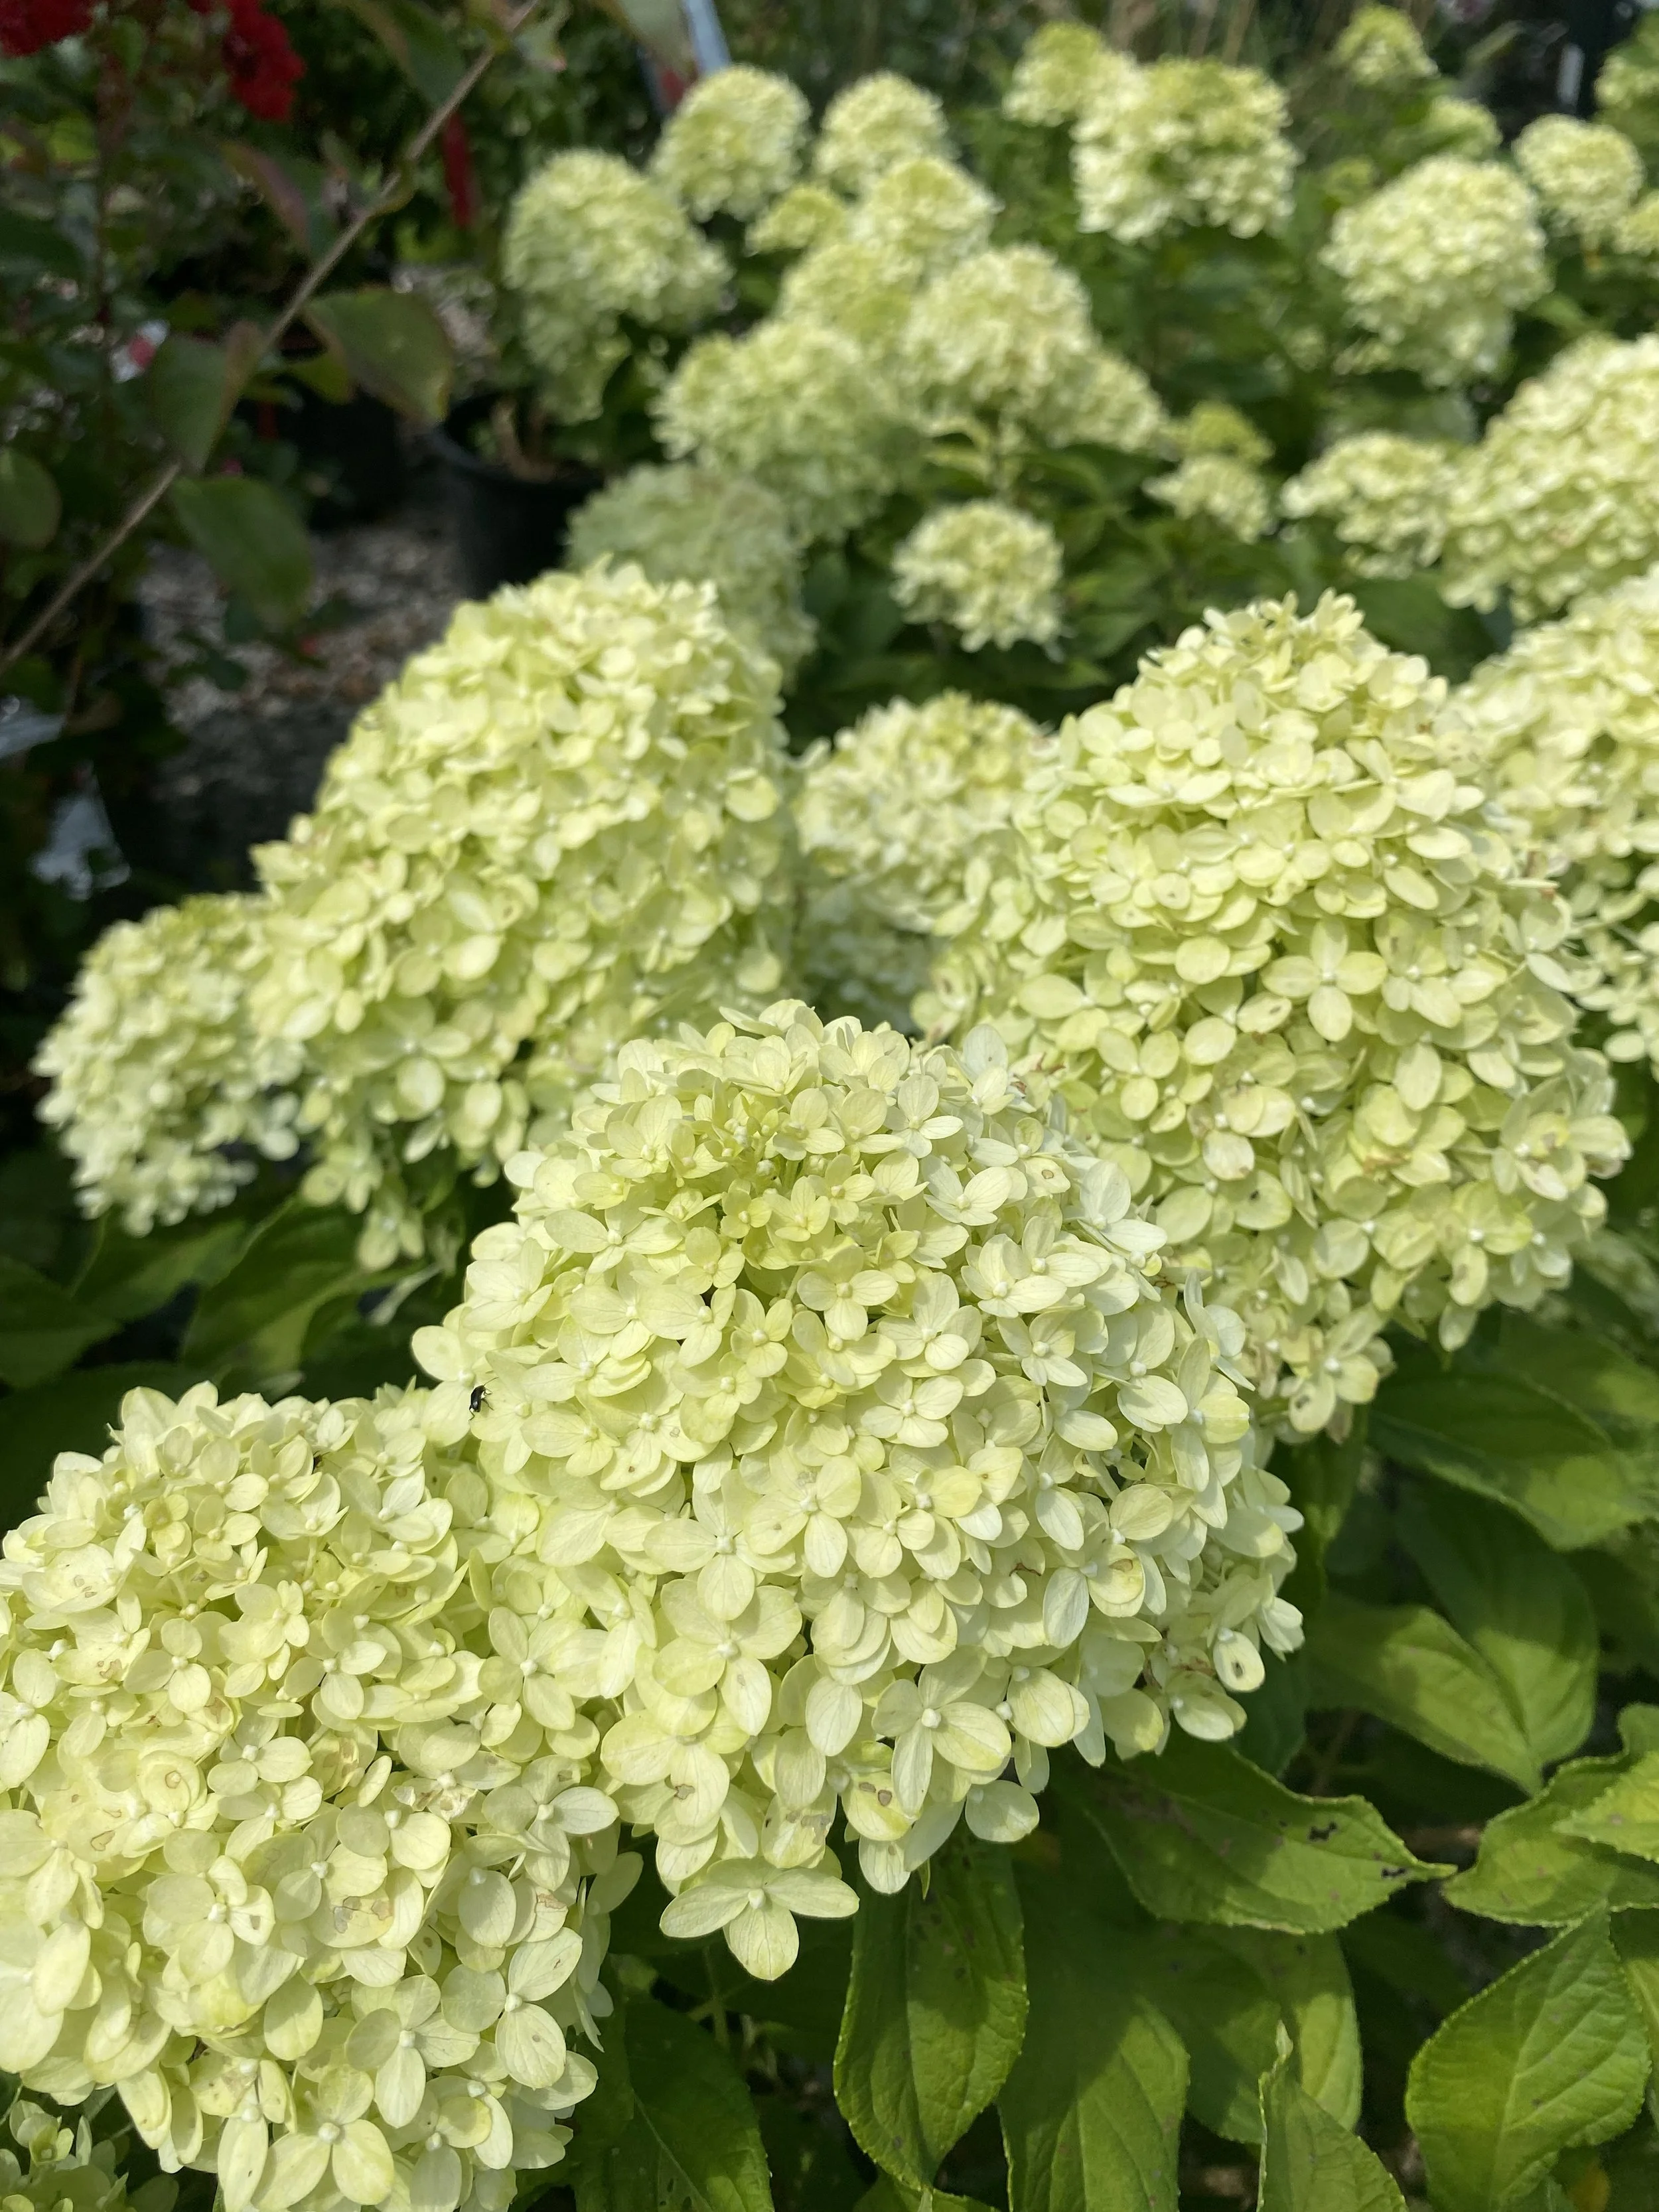
Panicle Hydrangea
Oakleaf Hydrangea (H. quercifolia) – I’m a big fan of these, too. Besides huge flower clusters in May-June, they also have interesting foliage. The leaves are oak-shaped...hence the name...and dark green during the growing season, taking on great fall color at the end of the season with shades of burgundy, red, and orange. This species gets bigger, but there are a lot of great forms that stay smaller. They bloom on old wood, so don’t prune these back; just let them grow, and you will be rewarded!
Panicle Hydrangea (H. paniculata) – This species has gained tremendously in popularity over the last 20 years due to a long list of amazing new introductions, combined with the fact that these are so easy to grow.
Once again, they all bloom white. Some selections will fade into shades of pink or even raspberry-red as the blooms age, but unfortunately, our hot weather doesn’t support this transition very effectively. Just plan on white, and you won’t be disappointed.
Mature size is variable. Some get big, some stay small, and others land somewhere in between. They all bloom on new wood, so blooming is very reliable. You can prune these back coming out of winter to control size without removing future flowers. They’re easy.
The other important difference has to do with planting exposure. These types want to be situated in lots of sun, not shade. Plant them out in full sun to half-day sun, and you’ll be rewarded with lots of flowers. Get them in too much shade, and they will be leggy, and blooms will be sparse or non-existent.
If adding a hydrangea to your garden sounds interesting, come on out and check them out. If you’re like me, you’ll be finding a spot for one...or two...or three...
Have fun!
—Cameron Rees
more EVENTS, SALES & ANNOUNCEMENTS:
Keep an eye on this section in the future for important info and extras you won’t want to miss!
